


Hey Sminkers, how are you all? Staying warm I hope! Our 4 year old is battling a cold at the moment so our house is not the most enjoyable environment right now. He's tired, miserable and totally bored. I'm crossing my fingers I don't catch it. The plan is to not think about it and hopefully it won't happen...so lets talk cards :)
On the weekend I had my Fun Folds class. It was one I had been wanting to do for a while and although it was a small class we still had a blast! We made four cards, all with different folding techniques, and it was great fun to mix it up and create something completely different to what we usually do. One of the definite favourites on the day was this one;

This one is called a Gate Fold card which can be done in lots of different ways however this is probably the easiest. I have used several of the products from the Seasonal Catalogue which finishes on June 30th so if there is anything you love and can't live without be sure to get it before then. The card base is cut from Melon Mambo card stock (20cms x 14.8cms scored at 5cms and 15cms on the 20cm side) and I have used the Sunshine & Sprinkles Designer Series Paper for the panels (14.3cms x 4.5cms) on the front. I cut out a piece of Whisper White card stock using the Labels Collection Framelits then ran it through the Big Shot in the Cloudy Day Embossing Folder. Using some more Sunshine and Sprinkles DSP I made the pinwheel using the Pinwheel Sizzlit and a Brights Brad in Marina Mist. I then adhered this to the Whisper White card stock, attached a toothpick and greeting using the Itty Bitty Banners Stamp Set and Bitty Banners Framelits. The Whisper White piece was then attached to the left hand panel with Snail and that's it. I also adhered a piece of Whisper White card stock on the inside of the card to write on. Super simple card but so fun and playful at the same time.
The next one we made was my favourite of them all, the Joy Fold card. This one was a bit more involved with lots of layers but I was really happy with the final product. If you would like the dimensions for the card stock and DSP send me an email and I will forward them to you. I have used Island Indigo and Daffodil Delight card stock, Summer Smooches DSP and the really cute Moving Forward Stamp Set. What do you think?

After this one we moved onto the Side Spring card. For this one we used Lucky Limeade and Wisteria Wonder cardstock and the DSP was from the retired Festival of Prints DSP stack. I used the Beautiful Butterflies Bigz Die, some Vellum and the Perfect Polka Dots Embossing Folder. The original sample I made didn't have the Wisteria Wonder matting under the DSP and it didn't look quite finished but I'm much happier with it now I've tweaked it a little bit. You'll also noticeI didn't put a sentiment on this one because I like to have some cards ready to go that I can send last minute and choose an appropriate sentiment at the time. Here's a picture for you.

So last but definitely not least we made the Twisted Card. Now I first saw this type of fold at Convention last month when I received a few as swaps and I was loving how they could double as a gift card holder. I must admit it looked quite complicated but once I watched the tutorial I found online by Patsy Waggoner it definitely made more sense. If you would like to view this video you can find it here. I chose to use Soft Suede card stock for the base and Comfort Café DSP, Very Vanilla, Cajun Craze and Summer Starfruit card stock to co ordinate with it. I also used the Blossom punch for the flower and the Designer Naturals Buttons and Linen Thread to finish it off. I'd love to know what you think.
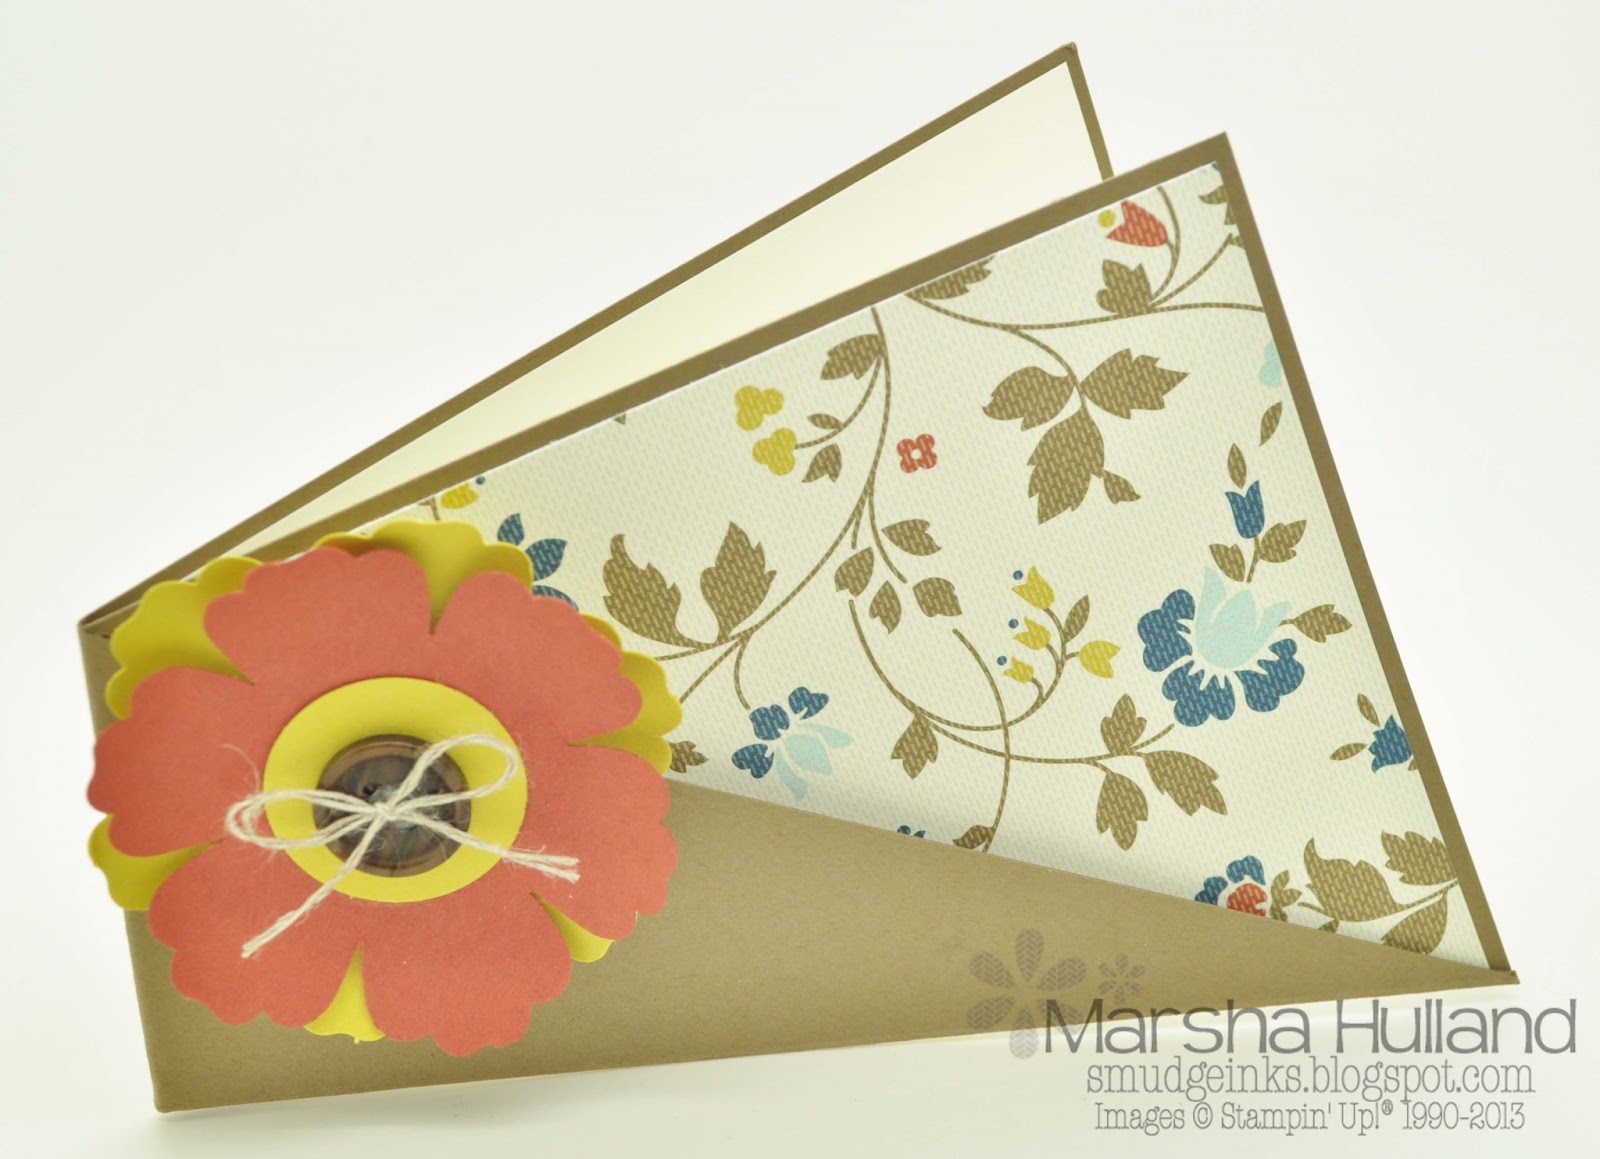

Do you like the colours? I'm not usually a fan of brown tones but I really loved this DSP when it was released last year. It also has some great patterns and colours which are perfect for masculine cards so you might see it a bit more in my Fathers Day class in August. As you can see I have left the sentiment off this one also as I just don't have a specific use for it as yet. There is enough room however to stamp a sentiment above the pocket and heaps of space for a personal message on the opposite side. I can definite see myself making more of these to keep on hand for people I usually give gift cards to. Hmm maybe I better get some Christmas ones happening also. Anyway I hope you like what I have shown you today. Thanks for stopping by and have a great day!
Marsha xx
Beautiful cards, tfs!
ReplyDeleteThank you Tracey :)
ReplyDeleteDo you have instructions on how to make these cards? Especially the last one.
ReplyDeleteNever mind, I guess I should read first! I found the tutorial. Looks like a fun card and a great idea for Christmas gift card giving!
DeleteHi Kathy
DeleteThanks for stopping by! The Twisted card will be fantastic for Christmas gift cards :) Did you still need any details regarding measurements etc on any of these cards?
Marsha xx
I would love the instructions for the joy fold....it's my favorite too. Really love the indigo and daffodil colors together. Thanks! eldeming@comcast.net
ReplyDeleteThanks...I will email the details to you soon :)
Delete